 My Cart
 Creating a Python Project – Installing the AvaSoft Library
This post is the first in a series on “Creating a Python Project for Spectroscopy”
In this tutorial, I want to show you how to set up an Avantes spectrometer outside of AvaSoft. This is useful for incorporating spectroscopy into an existing imaging project (e.g., a microscope), or to synchronize with other equipment (e.g., a Raman spectrometer).
Subscribe to our newsletter to get the latest updates on this project!
Getting the AvaSpec library
Please download the AvaSpec library here (registration required) or contact your local sales representative.
Installation on Windows
The AvaSpec Library for Windows is offered as two packages for the following platforms:
AvaSpec-DLL package for 32-bit Windows Platforms
The AvaSpec-DLL package is a 32-bit driver interface package for the current Avantes spectrometer boards, that can be installed under the following operating systems:
- 32-bit Windows Vista/Windows7/Windows 8/Windows 10
- 64-bit Windows Vista/Windows7/Windows 8/Windows 10
The installation program for the SDK can be started by running the downloaded file “setup32.exe”. Note that the 32-bit versions of the programming environments run perfectly well on 64-bit versions of Windows.
AvaSpecX64-DLL package for 64-bit Windows Platforms
The AvaSpecX64-SDK package is the 64-bit version of the AvaSpec driver interface. It is needed when you want the Library to cooperate with 64-bit programs, like self-written 64-bit programs or the 64-bit versions of LabVIEW or MATLAB. Note that the 32-bit versions of LabVIEW or MATLAB can run perfectly well on 64-bit versions of Windows. You will have to determine your version, generally this is displayed in the About box of each program. The Visual Studio IDE is a 32-bit application that can generate either 32 or 64-bit programs.
The AvaSpecX64-DLL package version can be installed under the following operating systems:
- 64-bit Windows Vista/Windows 7/Windows 8/Windows 10
The installation program for the AvaSpecX64-DLL package can be started by running the downloaded file “setup64.exe”.
Appendix D, 32 versus 64 bit development at the end of this post includes more detailed information which installation file to select.
These posts describe the installation, functions and sample programs of the 32 bit as well as the 64 bit AvaSpec Library unless otherwise noted.
Installation Dialogs on Windows
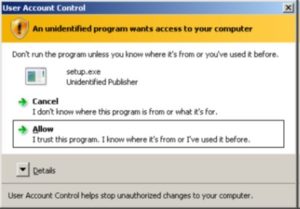 If you use Windows Vista, and the UAC setting is enabled, you will get the warning displayed to the left. Please select “Allow” to install the package.
This installation is password-protected. Please use this Contact Link, so that a member of our sales team can reach out to you and provide you with the password.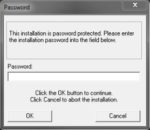
The setup program will check the system configuration of the computer. If no problems are detected, the first dialog is the “Welcome” dialog with some general information.
In the next dialog, the destination directory for the AvaSpec Library package can be selected. The default destination directory is C:\AvaSpec-DLL_<version_nr> or the 32-bit version and C:\AvaSpecX64-DLL_<version_nr> or the 64-bit version of the library. If you want to install the software to a different directory, click the Browse button, select a new directory and click OK.
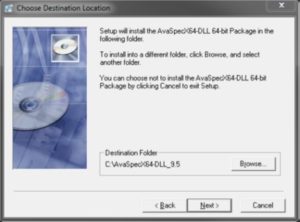
If the specified directory does not exist, it will be created.
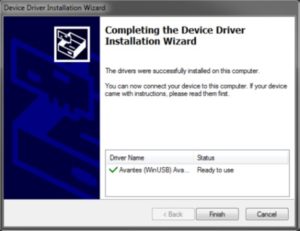 Next, the WinUSB device driver will be installed for the AvaSpec boards. The Device Driver Installation Wizard will be launched automatically. The last dialog in the Device Driver Installation Wizard displays whether the WinUSB driver has been installed correctly. If you experience problems here, please refer to Appendix A, which describes some special cases.
After all files have been installed, the “Installation Complete” dialog shows up. Click Finish.
Connecting the hardware
Connect the USB connector to a USB port on your computer with the supplied USB cable. Modern versions of Windows will install the driver silently, without displaying dialogs.
Launching the software
This AvaSpec Library manual can be opened from the Windows Start Menu. The source code of the example programs can be found in the Examples folder, default location for both packages are;
C:\AvaSpec-DLL_<version_nr>\examples\
C:\AvaSpecX64-DLL_<version_nr>\examples\
If you are using the Ethernet interface of the AS7010 board and experience problems opening a connection, please refer to Appendix B, which describes some common pitfalls.
Installation on Linux
The AvaSpec Library is a dynamically linked shared library for the Linux operating system. It uses the libusb library for USB communications. The AvaSpec Linux Library supports all available Avantes boards: the AS5216 board, the Mini board and the AS7010 board.
At present, the library is available in binary form only. Binary versions are available for a number of Linux distributions. Here are the current supported Linux Distributions:
- Ubuntu
- Red Hat
- Raspbian
Please contact Avantes when a binary version is needed for a specific Linux version or distribution which is not available in the current Avantes portfolio.
Sample programs using the library are also available. They are written for C++/Qt5 and Python/PyQt5. They include source code.
Connecting the hardware
Connect the USB connector to a USB port on your computer with the supplied USB cable. The AS7010 can also be connected to your network through an Ethernet cable. Depending on the presence of a DHCP server in your network, you may have to assign a fixed IP address to the board. It is recommended that you do this through the USB interface, using the full Qt5 sample, or the IP settings utility (available for Windows only).
Installation on macOS
The AvaSpec Library is a dynamically linked shared library for the Linux operating system. It uses the libusb library for USB communications. The AvaSpec Linux Library supports all available Avantes boards: the AS5216 board, the Mini board and the AS7010 board.
At present, the library is available in binary form only.
Sample programs using the library are also available. They are written for C++/Qt5 and Python/PyQt5. They include source code.
Connecting the hardware
Connect the USB connector to a USB port on your computer with the supplied USB cable. The AS7010 can also be connected to your network through an Ethernet cable. Depending on the presence of a DHCP server in your network, you may have to assign a fixed IP address to the board. It is recommended that you do this through the USB interface, using the full Qt5 sample, or the IP settings utility (available for Windows only).
This post is the first in a series on “Creating a Python Spectroscopy Project”
Subscribe to our newsletter to get the latest updates on this project!
Appendix A: USB Driver Installation on Windows
The AvaSpec Library uses the Microsoft WinUSB driver, both for 32-bit and 64-bit Windows Operating Systems.
Until May 2011, on 32-bit Windows systems, an Avantes kernel driver was used as the standard USB driver. On 64-bit Windows, the WinUSB driver has always been used.
Support for the WinUSB driver on 32-bit Windows O/S has been implemented in as5216.dll version 1.8 and later.
Installing the WinUSB driver is now the standard on all Windows O/S, except for ancient Windows versions that lack WinUSB driver support (like Windows 2000 and Windows98). On these versions, you will need to use an older version of the Library, like as5216.dll version 2.2.
In this Appendix, some compatibility issues will be described that may occur after upgrading to WinUSB:
- After installing the WinUSB driver and connecting the AvaSpec-USB2 spectrometer, the spectrometer cannot be found.
- After installing the WinUSB driver, the spectrometers first worked fine, and the Device Manager shows a proper installation of the WinUSB driver. However, after installing some application software the spectrometer cannot be detected anymore. Also the sample programs shipped with as5216.dll v 1.9 cannot detect an AvaSpec-USB2 anymore. The Device Manager still shows a proper WinUSB driver installation.
- After installing the WinUSB driver, the spectrometer runs fine with the sample programs shipped with as5216.dll v 1.9, but not with other application software.
A1: Spectrometer cannot be found after update to WinUSB driver
After connecting the spectrometer to a USB port of your PC, Windows will install the device driver. If all goes well, this will be displayed in the lower right corner of your screen with the message ‘Device driver software installed successfully’.
We have seen instances, where this message will not appear, and where it is necessary to open the Device Manager, to let Windows find the installed driver files. To open the Device Manager, right click ‘Computer’ in Windows Start menu, and select ‘Properties’. Then click the “Device Manager” option.
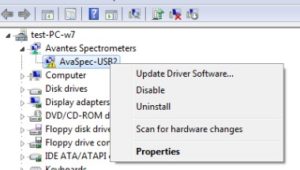 The ‘Avantes Spectrometers’ entry will show a yellow triangle with an exclamation mark. Right-click the AvaSpec-USB2 line and select the “Update Driver Software” option, as shown in the figure at the left. In the next dialog, select “Search automatically for updated driver software”. Windows should now find the correct files and install the driver software.
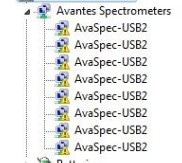 In multichannel spectrometer systems, it may be needed to repeat this step several times (once per channel).
A2: Device Manager shows a proper WinUSB driver installation, but AvaSpec-USB2 cannot be detected anymore
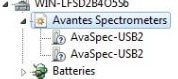 If the WinUSB driver has been installed properly, the Device Manager will display the connected devices without the yellow triangle with exclamation mark. The sample programs that are shipped with this version can be executed and everything runs well. However, after installing some application software, it is possible that the spectrometer cannot be detected anymore. The sample programs cannot detect the AvaSpec-USB2 spectrometers either. One reason can be that the application software uses an old as5216.dll version 1.7 or earlier, as will be described below under A3.
The problem can also be caused by the installation program that installed the application software. When installing AvaSoft version 7.6.0 or earlier versions, the Avantes kernel driver (AVSUSB2.sys) will be installed, without uninstalling the WinUSB driver. The as5216.dll will try to communicate through the most recently installed driver (avsusb2.sys), while the WinUSB driver is the one that is active in the Device Manager. The problem can be easily solved by reinstalling the most recent application software (AvaSoft 7.6.1 or later), or reinstalling the as5216-dll package. In the driver selection dialog, select the (recommended) WinUSB driver. The same situation may occur when the Avantes kernel driver is installed by other application software (AvaSoft-Thinfilm-USB2, AvaSoft-Raman-USB2, or third party applications).
A3: After installing the WinUSB driver, the sample programs and AvaSoft are running fine, but other application software cannot detect the AvaSpec-USB2 spectrometer anymore.
Most likely, the as5216.dll version used by the other application software does not support the WinUSB driver. The WinUSB driver is supported by the as5216.dll since version 1.8.0.0.
Appendix B: Using the Ethernet Spectrometer
This section describes some details to avoid common pitfalls that can occur when using the Ethernet interface of the AS7010 spectrometer.
B1: DHCP vs. Using Static IP Addresses
The spectrometers are shipped with DHCP enabled. This means that they will be assigned a unique IP address in the correct range if you connect them to a network on which a DHCP server is running. If you connect the spectrometer to your office network for the first time, please ensure that a DHCP server is present on that network.
The spectrometer can also be used with a static IP address configured. You can change the network settings of the spectrometer with the IP Settings AS7010 utility that is e.g. distributed with AvaSoft 8. When using the spectrometer with a static IP address please make sure that the used IP address is in the same range as your host PC.
When using the spectrometer within a local network (a network with only one host (PC) and one or more Ethernet spectrometers with static IP addresses), you will have to change the IP settings of your PC from DHCP to static as well. This is also described in the IP Settings AS7010 manual in more detail. Of course, you can also use DHCP enabled spectrometers within the local network, provided that there is a DHCP server running on your host PC. There are several simple to use and freeware DHCP servers for Windows, such as one available from www.dhcpserver.de.[check this]
Please consult your network administrator for the availability of any DHCP server on your network or for using static IP addresses on the spectrometers. It is very important that the Ethernet spectrometers are configured with the right network settings, since otherwise major network problems can occur.
B2: Cables
You can use standard Ethernet patch cables to connect the spectrometer to your network. If you use a direct connection to your PC, make sure you have a GigE network connection, if you want to use a standard Ethernet patch cable. If your PC has an older Fast Ethernet connection (100 Mbps), then you will need a cross-connect cable.
B3: Routers
The Library uses a UDP broadcast to identify the spectrometers on the network. It is sent from each network adapter that is found in the host PC. Most layer 3 switches and routers will not allow this broadcast to pass, which will stop the Library from working. Be sure that your router will forward UDP broadcast packets to all ports within your local network. If there are connection problems, please also test a direct PC connection to make sure your router is not the cause.
B4: Firewall
The host firewall must allow both incoming and outgoing connections to the spectrometer. The spectrometer tries to connect to its host at TCP port numbers 4500 and 2400. Within your firewall
settings, both ports should be open for inbound and outbound. If the Windows Firewall is enabled, then a dialog will appear if you first use a program that will access the network:
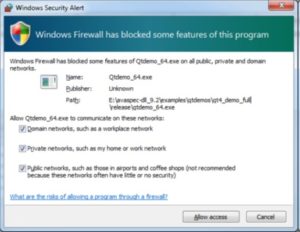
Make sure you check all three boxes and press the ‘Allow access’ button, to allow the program access. Switching the firewall off completely will of course also work, but may not be advisable. You may have to restart the program that uses the Library to have things work correctly.
B5: AvaSpec Library / Firmware Version Conflicts
With AS7010 firmware version 1.3, the discovery protocol has been changed. If your firmware is older than version 1.3, you will not be able to use the latest versions of the AvaSpec Library (9.2 and later).
Please contact Avantes support or your local sales representative to upgrade the spectrometer firmware to the latest version with an update utility.
B6: Connecting both Interfaces at the Same Time
If you connect both the USB and Ethernet interfaces, then the USB interface will have priority. If, however, an Ethernet connection has already been made, then plugging in a USB cable will not break the Ethernet connection.
Appendix C: Notes on Recompiling the Qt Demos on Windows
Installing Visual Studio
Microsoft offers Visual Studio in a free ‘Community’ version, or a paid ‘Professional’ version. Recent editions of the free version are fully equipped to be used with Qt. You can download these versions from visual studio. Versions 2013 and 2015 are available as a small web-installer or a large DVD image.
Versions 2017 and 2019 are only available as a web-installer, although you can generate a customized offline installer by running the web-installer with a special syntax. With versions 2017 and 2019, you will only need to install the ‘.NET desktop development’ and the ‘Desktop development with C++’ for .NET and Qt5 development.
Please note that as of VS2017 Visual Studio no longer supports development of .NET Windows Forms applications using C++. Please look at the full Qt sample instead. It uses the Qwt charting library. (We have also re-included an MFC sample, now compiled with VS2017. This sample does not use Qt.)
Installing Qt and Qwt
To install the framework Qt5 on Windows, either run the online installer, which is a small download from the Qt site, or the offline installer, which is a very large download.
Select the version that corresponds with your compiler and 32/64-bit choice, e.g. either msvc2015 64-bit, msvc2017 32-bit or msvc2017 64-bit.
Select Qt Creator under ‘Tools’.
You can either work with Qt Creator, or with Visual Studio.
If you want to work with Visual Studio, download and install the Visual Studio Add-In from the Qt site. This file is called e.g. ‘qt-vsaddin-msvc2017-2.3.0.vsix’.
To install the charting library Qwt on Windows, download and unpack e.g. ‘qwt-6.1.4.zip’ from SourceForge.
To recompile and install, open e.g. the ‘x64 Native Tools Command Prompt for VS 2017’ from the Windows start menu. Windows will reply with:
‘Setting up environment for Qt usage … Remember to call vcvarsall to complete environment setup!’
The vcvars batch file is needed in order to let the system find the correct Microsoft compiler files.
When using VC2017 to build a 64 bit version of Qwt enter the following lines:
cd c:\Program Files (x86)\Microsoft Visual Studio\2017\Professional\VC\Auxiliary\Build\
vcvars64.bat
cd c:\Qwt\vs2017\qwt-6.1.4\
c:\Qt\Qt5.12.3\5.12.3\msvc2017_64\bin\qmake qwt.pro
nmake
Recompiling the Qt Demos
The Qt5 samples contain both .pro project files for use with qmake, and .vcxproj files for use with Visual Studio 2017. If you use a different version of Visual Studio, do not attempt to use and autoupdate the .vcxproj project files. Please generate new ones from the .pro file with the Qt Visual Studio Add-in.
The path to the Qwt include files and link libraries must be entered correctly in the project. Depending on your disk configuration, you must change the paths to the Qwt files in the project.
The paths are present in the Property Pages, under ‘C/C++’, ‘Additional Include Directories’ and ‘Linker’, ‘Additional Library Directories’.
Change e.g. ‘E:\Qwt\vs2017\qwt-6.1.4\lib’ to ‘C:\Qwt\vs2017\qwt-6.1.4\lib’.
Please note that these settings can be present in the project file up to FOUR times, depending on Configuration (‘Debug’ or ‘Release’) and Platform (‘Win32’ or ‘x64’). If you use a different Visual Studio version, you can save some time by correcting the paths in the .pro file before importing it.
Appendix D: 32 versus 64 bit development
The AvaSpec development package is available in both a 32 bit and a 64 bit version.
Choice of development environment
Choosing which version of the DLL to use can depend on the following factors:
- Compatibility: 64 bit programs are mainly attractive because they enable the use of a much larger memory address space, e.g. if your project is doing large amounts of calculations, then it could benefit from using 64 bit. Development environments like MATLAB or LabVIEW are available in 64 bit. If you want to use the AvaSpec library in such an environment, you will need the 64 bit version of the DLL, otherwise your program will not be able to load the DLL. Note that you do not need the 64 bit version of the DLL just because you are using a 64 bit version of Windows. The 32 bit DLL works just fine with 32 bit programs under 64 bit Windows, in the WoW64 mode.
- Performance: In theory, 64 bit programs are faster than 32 bit ones, but in practice, there is also a larger amount of overhead involved. Do not expect the 64 bit data acquisition itself to be faster than the 32 bit one.
So mainly, the choice will be driven by the development environment that you already use. Note that the MATLAB setup does not even show that it is installing a 64 bit MATLAB version on 64 bit versions of Windows and that MATLAB as of version R2016 only comes in 64 bit.
If in doubt, please consult the About box of the program, which will announce if it is a 64 bit version.
It is perfectly possible to install 32 bit versions of e.g. MATLAB or LabVIEW on a 64 bit version of Windows and continue 32 bit development.
At present, our own software development continues to be in 32 bit, as there are no compelling reasons for using the 64 bit Delphi development environment.
Besides cross-platform compatibility, you will have to factor in points like the expertise of your programmers or the availability of ready-made components.
Setup of your Visual Studio configuration
The default target setting of Visual Studio 2008 or 2010 is ‘Any CPU’. This means your program will run as a 32 bit executable on 32 bit versions of Windows, and as a 64 bit executable on 64 bit versions of Windows. However, if you want to develop a 32 bit application on a 64 bit operating system (using the avaspec.dll rather than avaspecx64.dll), then this setting will result in a run time error at the startup of your program, as the program then will not load the 32 bit DLL.
If you do 32 bit development with Visual Studio 2008 or 2010 and the AvaSpec DLL on a 64 bit version of Windows, you will have to use the Configuration Manager and generate a 32 bit x86 configuration. Note that this will also generate a new ‘debug’ and ‘release’ subdirectory for the compiled binaries (one level down a new ‘x86’ subdirectory). Make sure that the avaspec.dll is available to the programs in these new subdirectories e.g. by copying the DLL file into them.
Request the AvaSoft Developer's DLL Kit
Explore options for the development of your custom application in spectroscopy. Request the developer's kit and start today!